
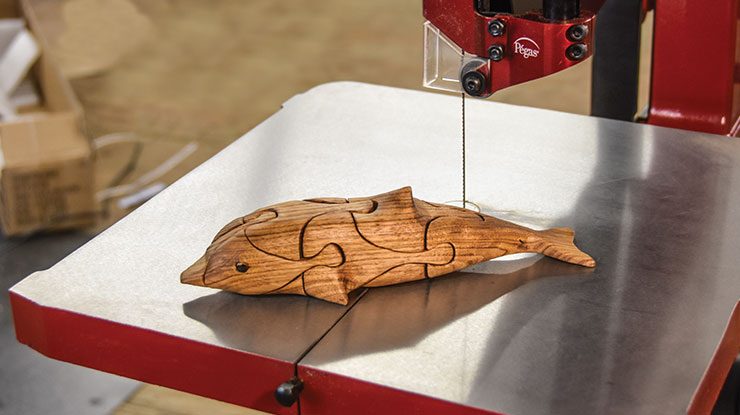
How does a sanding-screw saw work? These are some helpful tips to use a scrollsaw properly. Place your hands in the right positions. Keep the wood on the table. Plan your cuts. Make sure you use the right tool for the job. This video will assist you in getting started. Follow these steps to get started. This video is designed to help you master the scroll saw!
Set the speed to sand a scroll saw
Set up the scroll saw's blower and blade. The blower should be aimed at the blade or nozzle, depending on the type of cut you're trying to make. Make sure your scroll saw is ready to go by tightening the belt and applying lubrication. This is crucial for sanding. You can also adjust your blade to achieve the desired finish.
You must first examine your blade in order to set the correct speed for sanding. A well-balanced tool will not vibrate excessively and should leave a thin, sharp line. If the blade looks blurry, it may be too flimsy. If the blade isn’t cutting through the material properly, adjust the speed of your scroll saw.
With a scroll saw, you can make on-the/spot turns
Although a scroll saw gives you unparalleled control over cutting, it is important to remember several safety precautions. Before using the scroll saw, first ensure it is dry. Next, analyze the grain patterns for your project. Tape can also help keep the blade straight. When you're done with cutting, remove the tape. Then sand all edges. Apply a coat with lacquer spray after you are done. You should be aware that scroll saws can prove to be dangerous tools. Follow these safety precautions.
After you have decided what you want to cut with your scroll saw, you will need a pattern. To stop the blade veering off-line, you'll need to leave some positive space. Start by marking the pattern using pencil. Once you have your pattern, put on the appropriate gear. Then, guide your project through the scroll saw. Use the smallest available blade size but be careful not to veer off.
Use a pinless to sand scroll saws

It's easy to use a pinless scroll saw sander. You can easily smoothen the edge with most scroll saws by changing the belt. The belt is designed to fit most five-inch scroll saw models. The belt can be used for removing burns or correcting a wandering line of cutting. There are many options for belts that can be customized to meet the specific needs of your scrollsaw.
Pinless sanders will work with most scrollsaws and conversion adapters. They can be attached to the blade at the end, just as a Plain End blade or Pinned Blade. To use one, just cut the pivot head. To convert a Pin-End sander to a Pinless sander, simply install the conversion adapter and change the blade.
Use a sanding wheel to sand the scroll saw
A scroll-saw sanding tool belt can improve the quality of your woodworking projects. These belts can be mounted on all models of scroll saws and are made from durable plastic. These belts work best on larger woodworking projects such a table, countertop, or cabinets. You can purchase these belts in either 1/4" or 1/2" widths and in 80, 120, 180, and 220 grits.
A quality sanding belt can smoothen the edges of your scroll see and be used with a wide range of materials. It is best to have a range of grits available so that you can find the right one for your scrollsaw. A good grit belt should be at least half an inch wide. It should fit most scroll saws with a 5'' blade.
FAQ
What furniture can I refinish?
Yes! You don't have to hire a professional to refinish furniture. There are many ways you can do it yourself. Here are a few suggestions:
Sandpaper can be used to remove stains and scratches. Use a clean cloth to wipe the surface.
Use clear polyurethane varnish. Before moving furniture, let dry completely.
Use acrylic paint to paint furniture.
Instead of painting, use stain. Furniture will look richer with the stain.
Use shellac wax. Wax will protect the wood and add shine.
How often should new supplies be purchased?
You'll probably have to replace some of your tools over time. You'll need to sharpen your hand tools regularly if you use them. Power tools will require replacement parts every so often. Avoid buying too many products at once. Spread your purchases out over several months.
What types of woods are best for furniture making?
Woods are classified by their hardness. Softwoods include cedar, pine, cedar, and Cypress. They are great for outdoor furniture as they resist rot. These hardwoods include maple, mahogany and teak. They are generally indoors as they don't weather well outside.
Where can I begin with woodworking
The best way to learn how to build furniture is by building furniture. You will need tools. There are bound to be mistakes. But if your persistence is consistent, you will soon master the craft.
Choose a project that interests you. It could be something as simple as a box or as elaborate as a full-scale entertainment center. Once you have chosen a project, locate a local woodworker who is skilled in this kind of work. Ask them for suggestions on the tools you will need and where to buy them. Ask if you can find someone who does this kind work.
How much money will I need to get started?
Because each project is unique there are no exact numbers. These factors will help you get an estimate of how much money is needed.
-
Material costs
-
Tools and equipment
-
Time spent on the project
-
Your hourly rate
-
How much profit do you expect to earn
-
Whether you plan to hire help
You might start small if you are just starting out. As you gain experience, you'll be able to tackle more complex projects.
How do I determine what kind of wood my project is made from?
Always verify the label on wood purchases. The label should include information about the wood species and its moisture content as well as whether or not it has been treated using preservatives.
How can I keep my shop organised?
Setting aside an area to store tools is the first step in keeping your workshop organized. You want your tools to stay clean and free from debris and dust. Use pegboard hooks to hang tools and accessories.
Statistics
- Most woodworkers agree that lumber moisture needs to be under 10% for building furniture. (woodandshop.com)
- Overall employment of woodworkers is projected to grow 8 percent from 2020 to 2030, about as fast as the average for all occupations. (bls.gov)
- If your lumber isn't as dry as you would like when you purchase it (over 22% in Glen Huey's opinion…probably over 10-15% in my opinion), then it's a good idea to let it acclimate to your workshop for a couple of weeks. (woodandshop.com)
- The best-paid 10 percent make $76,000, while the lowest-paid 10 percent make $34,000. (zippia.com)
External Links
How To
How to make wood joints
This tutorial will teach you how to join two pieces wood together. We will use the "pockethole joint," which means that we drill holes in the wooden pieces and then glue them together. This works well if the wood is straight and smooth. You might consider dowel joinery if your wood isn’t straight or flat. These are the steps
-
Drill Pocket Hole Joints. First, measure the area where you wish to place the pocket joint. With a handheld drill machine or jig saw, drill 3/4-inch deep holes in the ends of each piece.
-
Sand Smooth. The wood's edges can be sanded to prevent splitting.
-
Glue Together Apply glue to both the ends of the wood. Let it sit for about 5 minutes before clamping the pieces together.
-
Secure the pieces together. Once the glue has dried, clamp the pieces together so they are flush.
-
Trim Joinery. Trim the excess wood around the joint after the glue has dried completely.
To be able to turn the pieces inside-out, leave enough room between them.