Chip carving is a difficult task if you have ever tried it. There are many different techniques and styles you can try. But, which one is the best? What tools do I need? I will be sharing my tips and tricks for carving chips. You can carve potato chips in a traditional or more modern way, but there are some essentials that will help you succeed.
Traditional
Chip carving is one of the oldest forms of decorative woodcarving. You will need a straight-edged blade knife, but you can also use a skew-ground and offset knife. Chip carving involves making small triangular cuts in wood to create patterns. This art form originated over 1,000 years ago. Due to its popularity, many of the designs were so similar across cultures that it was hard to distinguish one from the other.
As wood carving spread across the globe, generations passed down the skills. Chip carving was a popular way to decorate furniture in Sweden. Eventually, schools were opened to teach the craft. Modern chip carvers benefit from centuries of experience and the skills of carvers. Through the generations, knowledge was passed from carver to apprentice to student. It's a lifelong process that continues today.
Free Form
If chip carving has been something you've wanted to try, this is the place for you. A DVD by Murray Taylor shows you how to create freeform and geometric carvings. It's a good introductory project and contains lots of useful information. English and NTSC versions of the DVD are available. The DVD is also available in stereo and widescreen formats. Artisan Media Ltd. holds the DVD. It can also be downloaded in MP4 format to Windows and Mac computers.
Geometric chip carving is based on lines, circles, triangles and circles. This technique allows for endless shapes and patterns, and can also be used to combine various styles. This is also known free-form chip carving. It doesn't matter if you want your chips to look like a flower or a dragon. They will make a great addition to any room. The best way to incorporate different techniques into one piece is by freeform chip carving.
Techniques
Since centuries, chip carving has been a popular art form. These examples can be found all around the world. On paddles used for ceremonial purposes and boats in the South Pacific Islands, one example of chip-carving is found. Although most of these carvings were done with bits of bone or seashells, some have also reported using shark teeth. This book shows how to create stunning designs using a variety chip carving techniques.
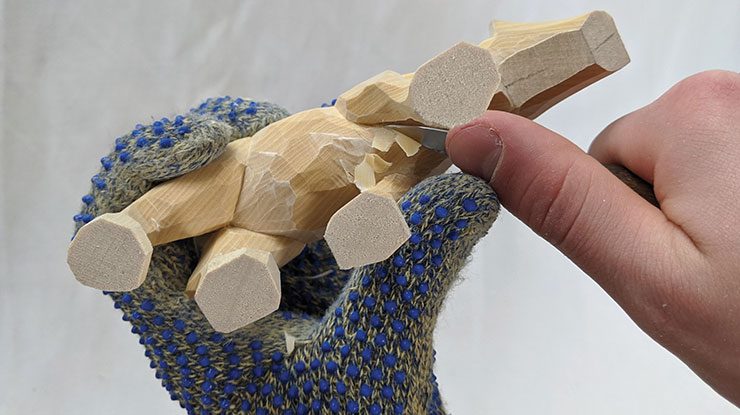
You can easily carve chip if your follow some basic steps. First, you need to learn how to carve the fine triangular shape. This pattern is easy and straightforward to understand. To carve this pattern, you simply need to carve various triangles and repeat this process over again. However, this does not mean that your chip carving has to be boring - by varying the triangles, you can create a range of wonderful patterns.
Tools
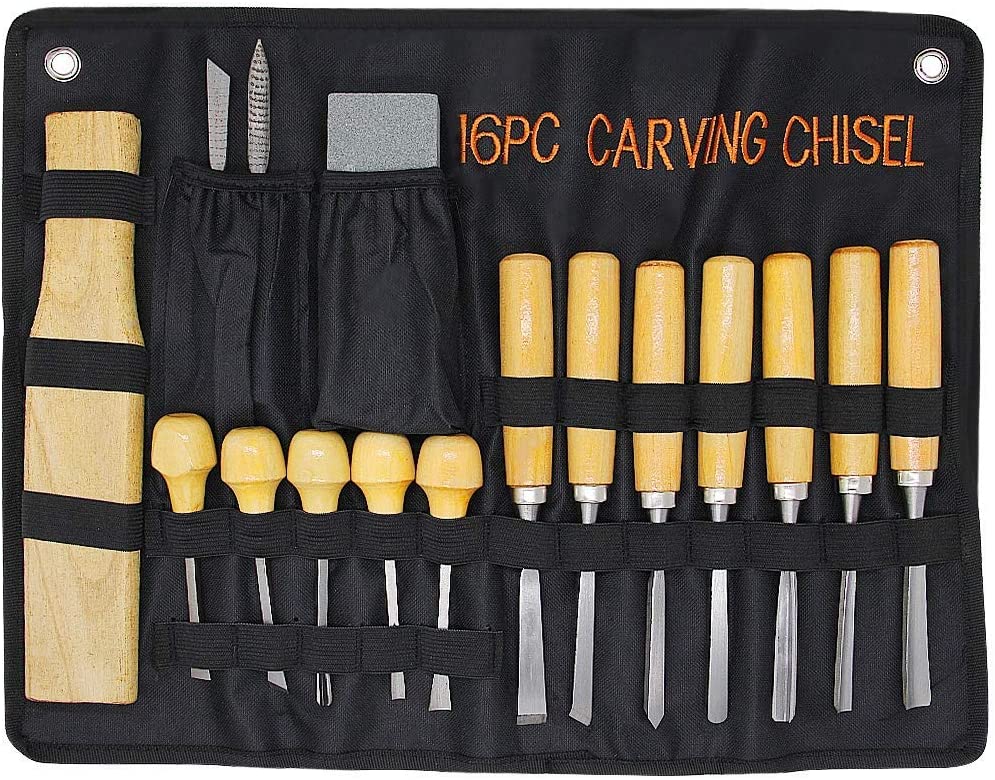
Lora S. Irish offers a free online seminar that will teach you the basics of chip carving. She shows you how to use a variety of carving tools and materials, such as a chip, stab, and detail knife. Irish also teaches you how to use different wood carving tools during this seminar. To purchase the right tool, you can choose from this list. You can use these tools to create simple shapes and designs, or work more intricately and make more intricate designs.
Special geometry is required for chip carving knives. It is one-half inch in length and has an angled back edge. This allows for precise incisions. A sharp point is essential to ensure that edges meet perfectly. Chip carving knives are also made of stainless steel and come with a sharp tip. A chip carving knife should be sharp and sharp enough to slice a bit of wood.
Getting started
First, learn about chip carving. The method you choose will depend on the type and purpose of your carving. However, these principles will help you ensure your work is accurate. Chip carving is a technique that involves creating a fine pattern in wood. Follow these steps to create your very first chip carve.
It is very important to sharpen a chip carving knife. The chip carving knife blade will have bevels either side. This means that it is a primary knife for chip carving. The sharpening stone can produce precise edges and is designed to look like a diamond. Place the stone at a 10 degree angle. The stone will simultaneously sharpen the chip carving knife and the chip carving tool.
FAQ
What is the minimum investment a hobbyist needs to make in order to get started?
It is likely that you will need some capital in order to buy the required tools and supplies if your goal is to open your own woodworking business. A good place to start would be by buying a small table saw, drill press, circular saw, jigsaw, and sanding machine. These items won't break the budget and aren't expensive.
Do you know anything more about woodworking?
It's easy to underestimate the amount of work involved in making furniture. Finding the right wood is the hardest part. It can be hard to choose from the many types of wood that are available.
Another problem is the fact that not all wood has the same properties. Wooden can split or crack, while some woods may warp. These things should be considered before you buy wood.
How much should a skilled woodworker earn per hour?
Hourly rates for professional woodworkers vary depending on many factors such as skill, experience, availability, geographical location, and other variables.
An hourly wage for skilled woodworkers is between $20 and $50.
A woodworker with less experience may be able to charge $10 an hour.
What material would your recommendation be to learn woodworking?
You can start with softwoods like pine or poplar. Once you feel comfortable with these two, move on to hardwood.
Is it possible to refinish your own furniture?
Yes! There are many different ways to refinish older furniture without the need for professional help. Here are some ideas:
Use sandpaper on the surface to remove any stains or scratches. Then wipe down the surface with a clean cloth.
Apply clear polyurethane varnish. Let dry completely before moving furniture around.
Paint furniture with acrylic paint.
Instead of painting, use stain. The furniture will get a rich look with the stain.
Shellac wax is applied. Applying wax will give the wood shine and protection.
How long does it take to finish a piece of furniture?
It depends on the type of wood you choose, the complexity of the design, and the amount of finishing you apply. Hardwoods, for example, require more maintenance than softwoods. Hardwoods are also more expensive than softwoods. But they last longer, and resist moisture better. The process of finishing a piece of furniture typically takes anywhere from one week to three months.
Can you teach yourself woodworking?
The best way to learn anything is by doing. Woodworking is an art form that requires patience, practice, skill, and experience. Any craft requires patience to master.
You can learn the most effective way to master a skill is by actually doing it. Start small and use what you learn.
Statistics
- Average lumber prices rose about 600 percent between April 2020 and May 2021. (familyhandyman.com)
- Woodworkers on the lower end of that spectrum, the bottom 10% to be exact, make roughly $24,000 a year, while the top 10% makes $108,000. (zippia.com)
- Overall employment of woodworkers is projected to grow 8 percent from 2020 to 2030, about as fast as the average for all occupations. (bls.gov)
- Most woodworkers agree that lumber moisture needs to be under 10% for building furniture. (woodandshop.com)
External Links
How To
How to join wood with no nails
Woodworking is an enjoyable hobby. Woodworking can be a fun hobby because you can work with your hands to make useful objects from wood. You might want to join two pieces from the same wood, but you don't need to use nails. This article will explain how to do this so that your woodwork projects stay beautiful.
Before joining the pieces of wood together, you will need to first trim any edges. You don't want any sharp corners to cause problems later. Now it's time to start glueing your boards together.
When working with hardwood, glue should be applied only to one side. Use glue on both the sides for softwoods, such as cedar or pine. Once you have applied the glue, press down on the boards until they are fully attached. Before moving onto the next step, make sure the glue has dried completely.
After you glue your boards together, drill holes at the joints where screws will be inserted. You can choose the type of screw to determine the size of your holes. If you are going to use a half-inch wood screw, you will need to drill at least 3/4 inch deep.
Once you have drilled the holes, the next step is to drive your screws through the joint into the board's backside. Don't hit the board's surface. You could damage the finish. When driving the screws, try to avoid hitting the ends of the screws too much. This will help prevent splitting of the end grain.
Once your project is complete, it's time to protect it against the elements. You can seal the furniture pieces or cover the top. You'll want a product that lasts for many years. Some examples include oil-based varnishes, polyurethane, shellac, lacquer, etc.
You can find these products at most home improvement stores. Make sure you get the right product for your job. Keep in mind that certain finishes can be toxic and should not be used indoors. When handling certain finishes, wear protective gear.