
Simple whittling projects can be used to obtain the Woodcarving merit medal. Name tags or badges are ideal for whittling. Scouts can choose to whittle badges or nametags with wood burning. Plaques are a good example of larger pieces that can be used for whittling.
Superhero logos are straightforward
While there are lots of superhero movies to choose from these days, many of the logos are very simple and easy to carve. The bat is a great place to start. Spiderman's web looks easy, while the Joker cards are not difficult to carve. After the Cub Scouts master the art of whittling the logo they can decorate a mirror or dresser with the final product.
The Shazam! The background of Shazam! This logo uses three-dimensional text and lighting to represent the comic story. Logos are often used by superheroes to illustrate their stories. But, the whittling projects for cubscouts could also be about branding and businesses. While superheroes are often associated with comic book stories, superhero logos are the perfect bridge between the two worlds of whittling and business.
Morfmir's whittled set of chess pieces
Whittled chess sets make a great project to earn the Cub Scouts' Webelos Craftsman badge. This set is made of non-wood materials and comes with instructions and a list of parts. It is simple to make a hardware chess kit, and kids will love playing the game when it is done.
A boy scout in New Hampshire made this unique set. Chandler Francis completed a metalworking merit card and made the board, pieces, and other parts at the blacksmithing pavillon. In the "Sinquefield Invention Lab," named after the late Dr. Jeanne Sinquefield, the scouts learn to use new technologies and get hands-on education. The project involved using a laser and 3D printer.
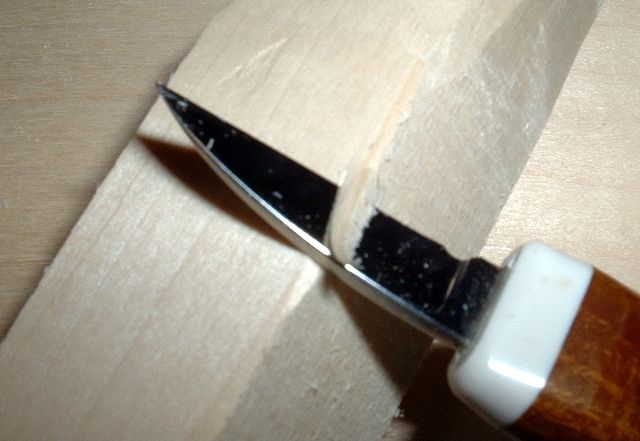
Woodcarving merit badge

Woodcarving ranks as one of the most popular Cub Scout elective medals. It is possible to earn it either as a cub and an older boy. This badge requires basic woodcarving technique, safety, and tools. Woodcarving can be completed by Scouts in their councils or at a special camp. Here are some tips to earn the badge
To complete this badge, you will need a good knife. A small, well-sharpened small pocket knife or folder is a great choice. While thumb guards made of ducttape are not required, they can prove to be very useful. Another option is to use duct-tape reinforced leather gloves. These gloves will protect your hands and allow you to use a sharp knife. These items must be safely stored throughout the project.
Woodcarving using a pocketknife
If you'd like to teach your Cub Scouts how to safely use a pocketknife, this activity is perfect for you. The Cub Scouts will have a blast creating their unique crafts, provided they follow safety precautions and use a sharp knife. Woodcarving is also a great way to teach them the benefits of knife skills and a safe, light touch.
Carving an animal is another great craft idea. Carving an animal can be very difficult. Cubs are able to carve their favorite animal or sport. Carving animals can be a fun way to teach them about different creatures. While they are creating, you can also help them learn more about them. Here are some ideas for a fun woodcarving project for your Cub Scouts.
Soap is a great way to introduce Scouts and leaders to woodcarving. Soap is safe and easy to use, making it safer for them to carve. Once they're confident with soap, they can move on to woodcarving. They can make spears, peel bark off sticks and even build tipis or slingshots!
FAQ
What tools are used by carpenters?
The most common tool used by carpenters is a hammer. A hammer is used for pounding nails into wood. A hammer is used to hold pieces together during a project. Other tools include clamps.
Is it easy to start a woodworking business?
It is difficult to start your own woodworking company. You will need to adhere to many legal requirements. It doesn't mean that you have to go through the entire process of starting a business. Many people prefer to join existing companies. You only need to pay membership and tax fees.
How often do I need to buy new supplies
Over time, you may need to replace your tools. Hand tools will need to be sharpened regularly. If you are using power tools, you will need to purchase replacement parts regularly. To avoid buying too much at once, try to spread your purchases out over a few months.
Statistics
- The best-paid 10 percent make $76,000, while the lowest-paid 10 percent make $34,000. (zippia.com)
- The U.S. Bureau of Labor Statistics (BLS) estimates that the number of jobs for woodworkers will decline by 4% between 2019 and 2029. (indeed.com)
- If your lumber isn't as dry as you would like when you purchase it (over 22% in Glen Huey's opinion…probably over 10-15% in my opinion), then it's a good idea to let it acclimate to your workshop for a couple of weeks. (woodandshop.com)
- Most woodworkers agree that lumber moisture needs to be under 10% for building furniture. (woodandshop.com)
External Links
How To
How to make wood joints
This tutorial will help you join two pieces of wooden together. The "pocket hole joint" is a method whereby we drill holes into the wood and glue them together. This method is great if your wood's straight and smooth. Try dowel joinery instead if your wood doesn't look straight. Here are the steps
-
Drill Pocket Hole Joints. Measure and mark the location where you would like to place the pocket hole joint. Next, drill 3/4 inch holes in each end of each piece using a handheld drilling machine or jigsaw.
-
Sand Smooth. You can sand the edges of the wood to ensure that it doesn't split.
-
Glue Together. Apply glue to the sides of both wood. Allow it to sit for approximately 5 minutes before you clamp the pieces together.
-
Secure the pieces together. After the glue has dried completely, you can clamp the pieces together until they are flush.
-
Trim Joinery. After the glue dries, trim any excess wood around your joint.
Make sure to leave enough room between the pieces so that you can turn them inside and out.