
Knowing what to look out for and what wood species to use is essential to carving a chain. There are many patterns and variations that you can choose from. Listed below are some helpful tips to help you get started. Now you are ready to create your own chain by learning how to carve one! You can create your own beautiful chain using these steps. You'll be delighted with the result! Be sure to treasure your chain after you have finished carving it.
Techniques
A chain can be used to decorate or as a gift wrap. You will need a long, square piece of wood to start carving. If you are an experienced carver, then basswood is the best choice. But, it can also be used to start carving. Pine wood is easier to use, but you will be frustrated until you become more proficient with the material.
A woodcarving magazine is a good resource to learn the art. Each article is written step-by -step by an accomplished author. These informative articles are written by experts and will walk you through every step of carving, from drawing your design to finishing it. Woodcarving is also a great hobby for children. These guides are great resources for woodcarvers beginning to carve a chain, regardless of whether they are carving their first project or their 100th.
Wood species
When carving a chain, there are many species of wood to choose from. Some species are harder to carve than other. If you're looking to create intricate designs with hardwoods, they are a great choice. These species are also more readily available and less likely to burn. Check out the Janka hardness rating of each wood type before carving. This information can also be found at Wikipedia or Bell Forest Products.
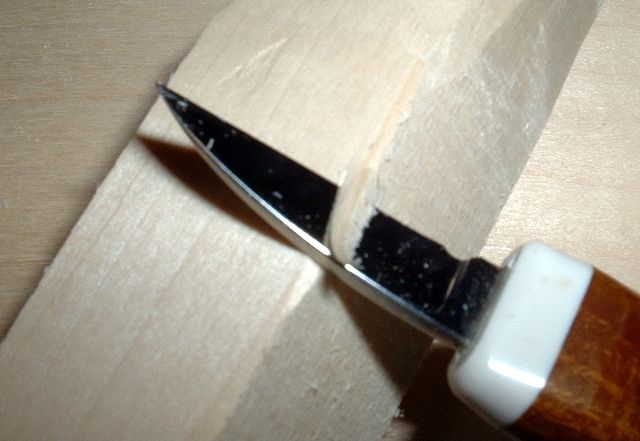
With a sharp jack or wood carving knife you can carve a link from wood. The result is a cross instead of a square. You can make any shape you wish, but the most effective wood chain is one of a single form. You can make a chain with any number of shapes but it's best if you stick with one. Also, the wood must be free from mud and bark as they can dull it and cause it to break.
Patterns

There are many wood carving styles, and chainwork is one of the most fun. The sample on the right is an example of one-piece wood carving with a shackle, four-foot chain, and 4'' round ball. Chain patterns consist of a grid pattern that determines the size and shape of each link. It will take a lot of knowledge to create a pattern out of a grid.
To carve a chain pattern, the first step is to hollow out the inside of the links. You can achieve the exact shape you want by doing this. Once you have the basic shape, you can begin refining the shape of the chain links and shaping individual profiles. Chain patterns can be square, circular, or octagonal. For beginners, the profile should be round. But if you're looking for a unique and beautiful chain design that is both functional and decorative, an octagon can be carved or a single diamond.
Variations
There are many methods of carving a chain. One is carving the link's profile in a different way. The inside of the links can be carved to make your chain either square or cross-shaped. If you are a beginner, you may want to stick to carving a single shape. You can then expand your chain carving skills and try different shapes. Here are some more common options.
To create a chain you can use either a knife, a solid-nosed cutter or a chisel. The same principles are used to carve decorative wooden vessels. A long bar is cut into a ring handle, spider, or links. This type if carving requires patience as mistakes can easily break the chain. You should also select a manager with the appropriate profile depending on what the chain will be used for.
FAQ
Where can I find free woodworking plan?
To find free woodworking plans, you don't have to buy any magazines or books. You only need to Google search. Simply type "free woodworking” into the search box and you'll find hundreds of websites that offer free plans.
What types of woods are best for furniture making?
Woods are classified based on their hardness. Softwoods include cedar, pine, cedar, and Cypress. Because they resist rot, softwoods can be used to make outdoor furniture. Hardwoods include oak, maple, mahogany, and teak. They're generally used indoors because they won't weather well outdoors.
How do you know which tools are the best for you?
It's important to consider your preferences and needs when buying tools. Do you prefer metal handles or plastic? What size of nails and screws do your hands use most? Are you more comfortable using power tools than hand tools?
What is the minimum amount I will need to start?
Since every project differs, it is impossible to give exact numbers. Consider these factors if you need to estimate the amount of money that you will require.
-
Material costs
-
Tools and equipment
-
Time spent working on the project
-
Your hourly rate
-
What amount of profit can you expect to make?
-
Hire help
If you're just starting out, you may decide to start small by making simple items such as boxes and picture frames. You'll become more proficient as you get experience.
Statistics
- Overall employment of woodworkers is projected to grow 8 percent from 2020 to 2030, about as fast as the average for all occupations. (bls.gov)
- Most woodworkers agree that lumber moisture needs to be under 10% for building furniture. (woodandshop.com)
- If your lumber isn't as dry as you would like when you purchase it (over 22% in Glen Huey's opinion…probably over 10-15% in my opinion), then it's a good idea to let it acclimate to your workshop for a couple of weeks. (woodandshop.com)
- Average lumber prices rose about 600 percent between April 2020 and May 2021. (familyhandyman.com)
External Links
How To
How to make wooden joints
This tutorial will teach you how to join two pieces wood together. We'll use the "pocket hole joint," which means we drill holes in the wood and then glue them together. This method is great if your wood's straight and smooth. You may want to consider other methods, such as dowel joining. These are the steps
-
Drill Pocket Hole Joints. Measure and mark the location where you would like to place the pocket hole joint. You will then drill 3/4" deep holes through each piece of wood with a jigsaw, handheld drilling machine, or hand-held drill.
-
Sand Smooth. You can sand the edges of the wood to ensure that it doesn't split.
-
Glue Together. Apply glue to the sides of both wood. Allow it to cool for at least 5 minutes before you attach the pieces.
-
Connect the pieces. Once the glue has dried, clamp the pieces together so they are flush.
-
Trim Joinery. After the glue dries, trim any excess wood around your joint.
Allow enough space between pieces so you can turn them inside out.