
How does a sanding scroll saw work? These are the best ways to use a scrollsaw correctly. Position your hands in the proper positions, keep the wood firmly on the table, plan your cuts, and sit at the correct height. Use the right tool. This video will assist you in getting started. Follow these steps to get started. This video is designed to help you master the scroll saw!
Set the speed to sand a scroll saw
Set up your scroll saw blade and blower. Depending on what type of cut you are trying to make, the blower should aim at the blade or the nozzle. You should also prepare your scrollsaw by tightening and lubricating the belt. This is essential for sanding, but you can also adjust the blade to achieve a desired finish.
Begin by inspecting the blade to establish the speed of sanding. A well-balanced tool won't vibrate much, and the blade should be a sharp, thin black line. The blade may be out of balance if it looks blurred. If the blade isn’t cutting through the material properly, adjust the speed of your scroll saw.
A scroll saw makes it easy to make on-the-spot turn
A scroll saw allows for unparalleled control in cutting, but it's important to take precautions before you use it. First, dry the wood before using it. Next, look at the grain patterns on your project. Tape is also an option to ensure the blade stays straight while you are cutting. When you're done with cutting, remove the tape. Then sand all edges. After you are done, spray lacquer. You should be aware that scroll saws can prove to be dangerous tools. Follow these safety precautions.
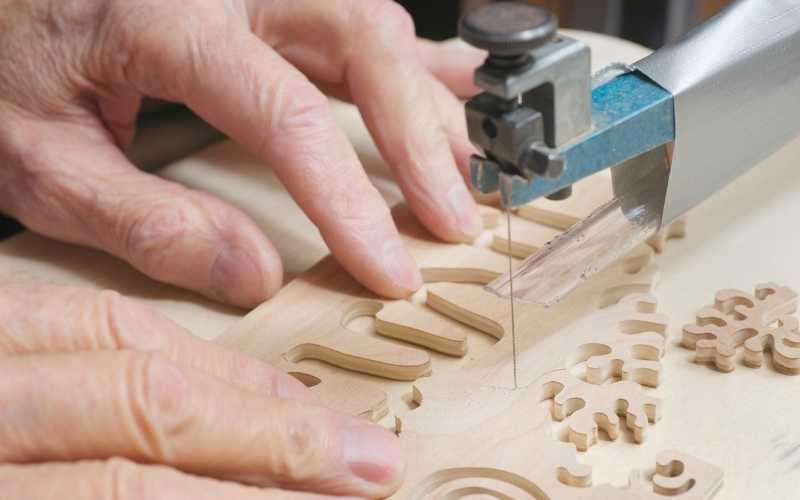
Once you've decided which cuts you want to make with a scrollsaw, you will need a template. To stop the blade veering off-line, you'll need to leave some positive space. Begin by marking the pattern with a pencil. Once you have the pattern, adjust the gear. You can then guide your project through the scrollsaw. Use the smallest blade size, but be aware of the dangers of veering off.
Use a pinless Sander to sand the scroll saw
The use of a pinless grinder on a scrollsaw is simple. The majority of scroll saws include a belt that can be adjusted to smoothen your cuts. The belt fits most scroll-saw models up to five inches in length. The belt can be used for removing burns or correcting a wandering line of cutting. To meet the needs of your scroll saw, you can purchase belts with different grades.
Pinless sanders will work with most scrollsaws and conversion adapters. They fit on the end of the blade just like a Pinned blade or Plain End blade. To make one, just remove the pivothead. Install the conversion adapter to convert a Pin-End from a Pinless sander and replace the blade.
A sanding belt is used to sand scroll saws
The smoothness of your woodworking projects' edges can be greatly improved by using a scroll saw sanding blade. These belts are made from durable plastic and have pin ends that can be mounted on most models. These belts are most effective for larger woodworking projects (tables, countertops, cabinets), as they can effectively remove bumps as well as correct wandering cuts. You can buy these belts in 1/4" width or 1/2" widths. Also available in 80, 120, 180, 220, and 220 grits.

A quality sanding belt can smoothen the edges of your scroll see and be used with a wide range of materials. A variety of grits is a good thing. A good gritbelt should be at minimum half an inches wide. It should work with scroll saws that have a 5 inch blade.
FAQ
How long does it take to finish a piece of furniture?
It depends on the type and complexity of your design as well as the amount of finishing that you use. Hardwoods, on the other hand, are more durable than softwoods. Hardwoods also tend to be more expensive than softwoods. But they last longer, and resist moisture better. It takes between one and three months to finish a piece.
What would you recommend as a starting material for woodworking?
Start off with softwood like pine and poplar. You will feel more comfortable with these softwoods, so you can move onto hardwood.
Do you have the skills to learn woodworking?
It is best to do it yourself. Woodworking is an art form that requires patience, practice, skill, and experience. To master any craft, it takes time.
The best way to learn how to do something is actually to do it. Start small and then build upon what you've learned.
Statistics
- The best-paid 10 percent make $76,000, while the lowest-paid 10 percent make $34,000. (zippia.com)
- If your lumber isn't as dry as you would like when you purchase it (over 22% in Glen Huey's opinion…probably over 10-15% in my opinion), then it's a good idea to let it acclimate to your workshop for a couple of weeks. (woodandshop.com)
- Overall employment of woodworkers is projected to grow 8 percent from 2020 to 2030, about as fast as the average for all occupations. (bls.gov)
- Most woodworkers agree that lumber moisture needs to be under 10% for building furniture. (woodandshop.com)
External Links
How To
Tips for driving a nail in wood
It is essential to pick the right size and style of hammer before you can drive a nail in wood. Claw hammers include mallets, claw hammers (sledgehammers), mallets, ball-peen hammers, hatchets, and mallets. Each type of hammer comes with its advantages and disadvantages. A clawhammer works best when hitting something hard like nails. However, it can sometimes be difficult to see exactly where the strike is going. A sledgehammer allows you to hit large areas simultaneously, but it is too heavy and cumbersome to use for small tasks.
After you've chosen the right tool, hold your hand flat to the handle so it rests comfortably in one of your palms. Hold the handle in your hand, but don’t force it too hard that you break. The hammer should be held straight up with your wrist relaxed. Next, swing the hammer toward the ground and aim for the nail's center. You should feel the impact of the hammer striking the nail. Try swinging a hammer using a block wood to practice until you are comfortable.
When you're ready to start driving the nail, hold the hammer in front of you close to your body. The nail should be perpendicular to wood's surface. Keep your eyes on the tip. Then, swing the hammer forward. Next, follow the motion of your hammerhead. Continue this motion several times, slowly increasing the speed of each swing. When you are confident with the technique, add power to your swings. You can hold the hammer over your shoulder and forcefully bring it down. You'll have more energy to work with.
Once you have made the first hole, remove your hammer. You can then remove the rest of the nails using a prybar or a screwdriver. To avoid splitting the wood, make sure the nail heads are not touching the board's surface.