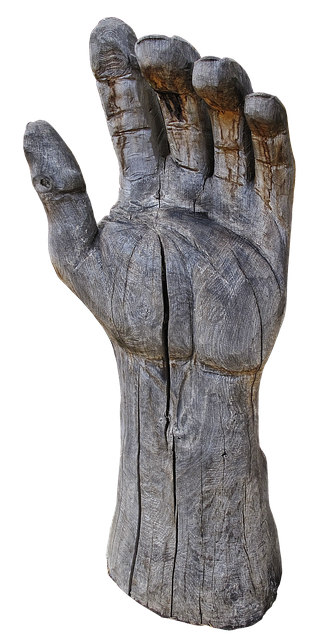
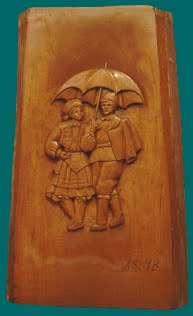
Choose a piece wood and begin carving the face. The expert will guide you through the process using a step-by, video tutorial. The progressing cut will make carving the face much more realistic. To create a realistic face, the progression of the noses is key. To create a lifelike finish, you can use colored dyes or shellac.
Hardwoods
First, consider the type of wood you intend to use when carving a wood face. Hardwoods are trees with broad leaves and can grow in a wide range of climate zones. Because of their wide range of density, strength, and appearance, hardwoods are suited for various purposes, including building and furniture. While softwoods are more affordable, hardwoods can be durable and fire-resistant.
If you are new to wood carving you might consider softwood such as butternut and basswood. These types of wood are more easy to work and are an excellent choice for beginners. Be aware that softer woods won't have the same finish and quality as hardwoods. It is important to try different wood types before you settle on one.
Softwoods
First, choose the type of softwood you want to use when carving a wood face. Softwoods are more difficult to carve, and often will have many knots. They are also more likely to crack if you use big strokes. Beginners will often cut small pieces of wood to reduce detail. It is not a problem but something to be aware.
Some hardwoods are more difficult to work with than others. Aspen butternut, basswood and butternut are some of the easiest to work. Use knives with a sharper bevel to achieve this. Softwoods are much easier to work than hardwoods. You can also carve them along or across the grain. The quality of the final product will be determined by the wood used for carving.
Colored Dyes
To create a vibrant, detailed finish on a wood carving, try using colored dyes. These dyes come in many colors, and you can mix them with alcohol or water to make your own unique color. Colored dyes can be mixed with shellac for lighter woods. To clean the brushes after applying dyes, be sure to ventilate. Paste wax is another option. Be aware that an excessive glossiness may distract from your work. Use 0000 steel wool to remove excess glossiness.
You can easily apply wood dyes in many different types. Wood dyes are compatible all topcoats, and they are easy to use. These dyes can also be used to solve common finishing issues. Because they come in a wide array of primary colors, they're easy to mix and apply. They come in many different shades, so you can mix them according to your personal preference. They can also be combined to create unique colors.
Shellac
Shellac should be available before you apply it to your wood carvings. A jar of shellac is available, but the best way to apply it to your wood carving is with a brush. Two-pound cuts will suffice. It will slowly build up and reduce brush marks. It is better to get a thicker cut of shellac than one that is thinner, as it is extremely water-thin. You can make your own pads from cotton lumps the size of golf balls and lint-free cloth. After that, dip the tip end of your brush in the shellac.
Shellac can add color and highlight grain. Shellac is available in a variety of colors so you can make custom mixes by mixing different shades. The lac can be used to darken the color. Unlike some other wood finishes, shellac won't yellow or become cloudy over time. It will also last longer, so you can make more faces. You can also do this with any wood carving project.
Gouges
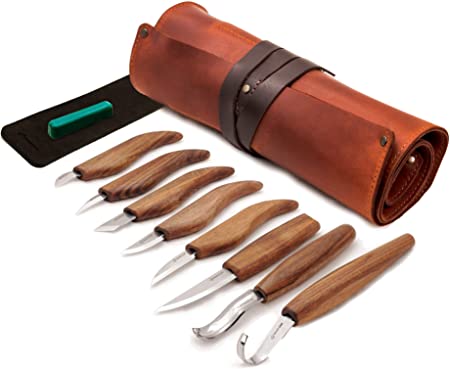
There are many sizes and shapes of gouges. The straight and the palm gouges types are the most commonly used. Straight gouges can only be held with one hand. Palm gouges, on the other hand, have shorter shafts. Hand held carving becomes much easier when the handles are shorter. Also known as veiners, palm gouges are great for carving faces in wood. Here are a few things to consider before you start carving.
The first step is to know how you can choose the right gouge. The gouge should be capable of carving a small v-shaped groove. Use a sharp, narrow edged tool. Gouges are often categorized according to their size. A 3/10 gouge will make the same-size cut as a 5/10 gouge. The scoop between the edges will get deeper and the sweep will become more curled as the first number goes up. A small sweep can carve a shallow profile in a gouge.
FAQ
What type of wood should I choose?
Woodworking is a popular job that involves oak, pine and maple. Every type of wood is different and can have a unique look and feel that will affect the final product. Oak, for example, tends be darker and more hard than other woods. Birch is light and soft, while mahogany can be heavier and more dense. You can also choose from solid wood or veneers. Veneers are thin sheets of wood that are glued together to form a single layer.
What amount of money do I need to get started with my business?
Because every project is unique, there aren't exact numbers. But if you want to get an idea of how much money you'll need, consider these factors:
-
Material costs
-
Tools and equipment
-
Time spent on the Project
-
Your hourly rate
-
What is your expectation for profit?
-
It doesn't matter if your goal is to hire help
Start small, if possible. You can make simple boxes or picture frames if you're just getting started. You will gain more experience and be able to tackle larger projects.
How long does it take for furniture to be finished?
It depends on the wood type you choose, the complexity and the amount you apply to the finished product. For example, hardwoods require more maintenance than softwoods. Hardwoods can also be more costly than softwoods. However, they are stronger and more resistant to moisture. The typical time taken to finish a piece furniture takes anywhere from one to three month.
Statistics
- If your lumber isn't as dry as you would like when you purchase it (over 22% in Glen Huey's opinion…probably over 10-15% in my opinion), then it's a good idea to let it acclimate to your workshop for a couple of weeks. (woodandshop.com)
- Most woodworkers agree that lumber moisture needs to be under 10% for building furniture. (woodandshop.com)
- Woodworkers on the lower end of that spectrum, the bottom 10% to be exact, make roughly $24,000 a year, while the top 10% makes $108,000. (zippia.com)
- Overall employment of woodworkers is projected to grow 8 percent from 2020 to 2030, about as fast as the average for all occupations. (bls.gov)
External Links
How To
How to properly use a saw
The wood is cut into pieces using a hand saw. These saws are most commonly used to cut wood into pieces. A handsaw can be made of metal or other plastic. It cuts through material such as wood and plastics.
A hand saw's main benefit is its ability make precise cuts at any angle, without the need to adjust it. Sharpening them is easy, unlike with power tools. But there are disadvantages. These devices are bulky and heavy so you need to be careful when transporting. Also, if you do not know how to use one, you could easily injure yourself.
You can hold a handsaw in many ways. When cutting, you should keep your hands away from the blades. If you don't, you might get hurt. When holding the saw, you should place your fingers around the handle, keeping your thumb up near the top of the blade. This will ensure that you don't accidentally touch or scratch the blade.
Use a hand saw only if you don't want anything to be under the piece of wood being cut. Doing so could cause the blade's surface to become uneven. Before you start cutting, ensure that you inspect the area. You must ensure that no nails, screws, or any other objects are under the wood.
Safety goggles should be worn when using a handsaw. They keep dust out of your eyes, making it easier for you see what you are doing. Safety glasses protect your head from flying debris.
If you plan to work with a hand saw, you must first learn how to operate it safely. Then, practice until you feel confident enough to start cutting things. Once you master the basics you'll be able to easily cut most anything.