
If you've ever wondered what a belt sander is, this article will help you. This section will provide tips and tricks on how to get a firm grip and select a fine abrasive material. You must first learn how to safely use your machine. If you don’t know how to properly use the belt sander, you could inflict injury.
Maintain a firm grip with a belt sander
Before operating a belt sander, ensure that it is turned off and that it has the correct sanding belt. If you are unsure how to align the belt with its front pulley, adjust the screw. Be sure to maintain good balance while operating the belt sander. Regularly adjust the belt tracking. This will ensure the belt sander works at its best.
Abrasive belts are a good choice
Abrasive Belts are rolled sheets abrasivepaper attached to a joint. They are angled between 45 and 80 degrees from the running direction of the belt. This helps avoid abrupt transitions at a belt's junction. A fine abrasive belt will make a significant difference in production speed. You have the option to choose from a variety of weights and materials.
Avoid sandpaper buildup
The most obvious tip to avoid sandpaper buildup when using sanders is to follow the correct grit sequence and avoid overloading the machine. This is crucial as too much or too slow of a rate of removal can cause burned belts. Aim to not allow dust to build up on the workpiece, as it can cause premature wear.
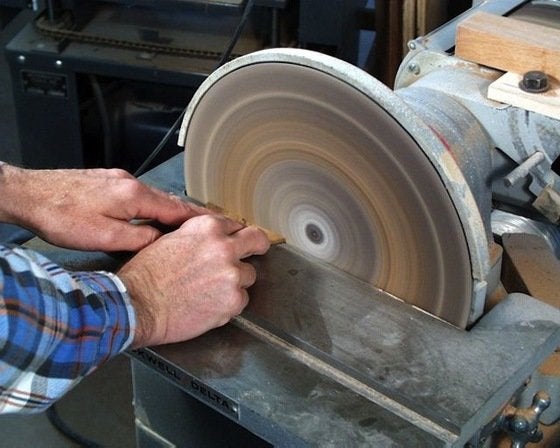
Use a belt sander with care
When operating a belt-sander, take safety precautions as with any power tool. Eye protection is essential. When you're using the sander to smoothen a piece, remove all dust and debris before you touch it. To prevent hearing damage, the belt sander can cause serious problems. Wearing earplugs and a shield to your face can protect your eyes. Wear work gloves, long pants, and a dust mask to protect yourself from the high-def sound coming from the machine.

Belt sanders can help you achieve better results
You can achieve better results with a belt-sander than ever before. However, there are some things that you should do before you begin sanding. You must first choose your position. When you are holding the sander you need to ensure that it is free from debris. Next, switch on the machine. Place the stock against the belt. Then, sand along the grain.
FAQ
How can I learn basic skills in woodworking?
The best way to learn how furniture construction is to make your own bench. This project can easily be done using whatever wood you have at your house. If you don't know what kind of wood to use, then go ahead and buy some cheap pine boards from Home Depot or Lowes. After building your bench, sand off any rough edges and apply a stain or varnish.
What kind of tools are used to carpenters?
Carpenters most often use a tool called a hammer. A hammer is useful for driving nails into wood. It also helps them hold pieces together while they are working on a project. Other tools include clamps.
What tools do I need to start as a woodworker and what should I learn?
Woodworking requires patience and practice. It takes time to learn how to use all the different tools and techniques required for woodworking.
There are many woodworking tools on the current market. Some people prefer to use power tools while others prefer manual tools.
You have the freedom to choose what tool you want, but it is important that you select the right tool for your job. You might start with a simple set of tools if you don't have much experience.
You might also consider learning how to use the router to create intricate shapes from wood. These tools can be purchased at most hardware stores.
Which woods are good to use for furniture-making?
Woods can be classified according to how hard they are. Softwoods are pine, cedar and cypress. They're often used for outdoor furniture because they don't rot easily. The hardwoods are oak, maple and mahogany. Because they can't weather outside, they're usually used indoors.
What type of wood should I choose?
Oak, maple, cherry and mahogany are the most common wood types used for woodworking. Each type of wood has its own unique characteristics that can affect the final product's appearance. Oak tends to be harder and darker than other woods. Birch is soft and light, and mahogany is denseer and heavier. You can also choose between solid wood and veneers. Veneers can be described as thin sheets of wood that have been glued together in one layer.
Statistics
- The best-paid 10 percent make $76,000, while the lowest-paid 10 percent make $34,000. (zippia.com)
- In 2014, there were just over 237,000 jobs for all woodworkers, with other wood product manufacturing employing 23 percent; wood kitchen cabinets and countertop manufacturing employing 21 percent. (theartcareerproject.com)
- Average lumber prices rose about 600 percent between April 2020 and May 2021. (familyhandyman.com)
- The U.S. Bureau of Labor Statistics (BLS) estimates that the number of jobs for woodworkers will decline by 4% between 2019 and 2029. (indeed.com)
External Links
How To
How to make wood joints
This tutorial will show how to join 2 pieces of wood together. We will use the "pockethole joint," which means that we drill holes in the wooden pieces and then glue them together. This method works great if your wood is straight and smooth. Dowel joinery might be a better option if your wood is not straight or flat. These are the steps
-
Drill Pocket Hole Joints. To start, measure and mark where you want to put the pocket hole joint. Use a jigsaw or handheld drilling machine to drill 3/8 inch deep holes at the ends of each wood piece.
-
Sand Smooth. You can sand the edges of the wood to ensure that it doesn't split.
-
Glue Together. Apply glue on both sides of the wooden plank. Allow the wood to rest for five minutes before clamping it together.
-
Clamp the Pieces Together. After the glue has dried completely, you can clamp the pieces together until they are flush.
-
Trim Joinery. Trimming the joinery after glue has completely dried.
Allow enough space between pieces so you can turn them inside out.