
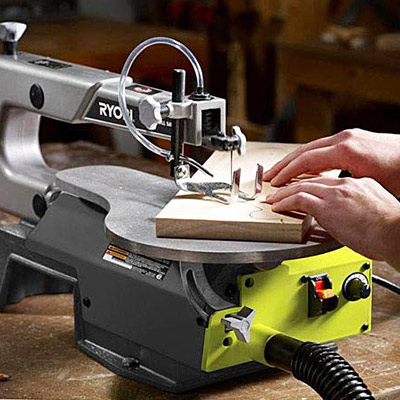
It is important that you properly tension your band saw blade before you begin to set it up. There are many ways to make your cut. You'll soon be cutting with ease if you follow these steps to set-up a bandsaw. Here are some tips that can help maximize the potential of your bandsaw. They may be difficult to follow at first, but they're definitely worth it in the end.
Set up a bandsaw using a tension gauge
To ensure the best blade tension, use a tension meter. Read the manufacturer's instructions before you begin to cut wood. These instructions may vary slightly depending on the model. First, you should turn the tensionwheel down a quarter to half turn. After you have achieved this, adjust the blade guides to the recommended FSR.
Deflecting the blade is another way to test your bandsaw's blade tension. Then, listen for a distinct tone. A tension meter, which is a highly accurate and costly tool, will enable you to adjust your blade tension to maximize blade life. A tension meter may cost $400 or more, but it is worth the price. A tension meter is not something you should be afraid of buying. You can use a gauge to check your blade tension.
A gauge is used to test the tension of the blades
When setting up a saw, it is crucial to use a gauge. All blades require equal tension to cut. The amount of tension will differ according to the pulling force, which is generally between 200 and 800 pounds. If you don’t own a bandsaw’s tension scale, it will give you an incorrect reading. So, what can you do?
A bandsaw gauge is composed two stainless steel plates which pivot past each others and are connected using a tensioning Spring. One plate has a numeric gauge, the other a pointer indicator. The gauge attaches to the blade using three pins. Two pins rest on either side, while the third pushes against the blade the other.
How to track a blade
Proper blade setup is crucial for achieving quality cuts. Proper blade height and tracking are vital for a successful cut. The blade height should be set at a level that allows for approximately one-eighth-quarter inch clearance from the material. Too low or too high a blade height can result in excessive vibration, friction, and a deviation of the line. A tracking knob can be used to stabilize wobbling blades.
First, track the blade. The blade should rest on the crown of a wheel, with its deepest part in the middle. Next, apply tension to the blade. The tracking control, which is located usually at the back of your saw, should provide the tension. Once you are satisfied with the position of the blade, lock the control. Once you've got it right, you can begin cutting.
A long blade is a good way to reduce drift
When setting up a band saw, the long blade should be positioned near the center of the crown, and the blade should not be too close to either the front or rear edge of the wheel. A typical blade will not be too far off center by about an eighth to quarter of an inch. However, if the blade is barely touching the wheel it may need some adjustments. Adjust the fence to correct this and tilt the upper wheels.
A long blade with the same angle to your blade is the best way to account drift when setting up band saws. This will decrease drift which is when material is lost as a wood cutter begins cutting the first piece of lumber. The video below will show you how to properly set the fence angle. You can also replicate the fence angle using a jig.
Use a fence to align your blade
Using a fence to align the blade on a band saw is a simple process. The fence should be placed on the fence closest to the fence. Slide the fence over the miter slots until the fence's face is flush with it. A finger may be used to align the blade properly.
Before adjusting the fence, you must set the blade guides. The band saw must be correctly set up. A sharp blade is required to place the fence. Adjust the fence to correct any blade movement. You can use a bevel square or a jig to measure the drift angle. How to do this? Watch the video. You must first determine what fence is causing the drift.
FAQ
What kind tools do carpenters use to build?
A hammer is the most commonly used tool by carpenters. A hammer is useful for driving nails into wood. They can also use it to hold the pieces together as they work on a project. Other tools include clamps, pliers, screwdrivers, measuring tape, pencils, saws, drills, and wrenches.
How do I get started with woodworking?
Learning how to build furniture is the best method. You'll need tools, and you'll have to make mistakes along the way, but if you keep at it, you'll eventually figure out what you're doing.
You should first choose the project you wish to complete. You could make something as simple or complex as a box. Or you could build a whole entertainment center. Once you have chosen a project, locate a local woodworker who is skilled in this kind of work. Ask them for their advice about the tools and where they can be found. Perhaps you could ask if there is someone else who does this type of work.
What type of wood should I choose?
Woodworking is a popular job that involves oak, pine and maple. Each type of wood has its own unique characteristics that can affect the final product's appearance. Oak, for instance, is darker and harder than most other woods. Birch, which is lighter and soft, is more heavy than mahogany. You can also pick between veneers and solid wood. Veneers are thin sheets of wood that are glued together to form a single layer.
What would be your first step in woodworking?
Start off with softwood like pine and poplar. After you are comfortable with the softwoods, move to hardwood.
What is the minimum investment a hobbyist needs to make in order to get started?
It is likely that you will need some capital in order to buy the required tools and supplies if your goal is to open your own woodworking business. The best place to start is by buying a small drill press, circularsaw, circular saw or sanding machine. These items aren’t too expensive so you won’t have to break the bank.
Statistics
- Average lumber prices rose about 600 percent between April 2020 and May 2021. (familyhandyman.com)
- The best-paid 10 percent make $76,000, while the lowest-paid 10 percent make $34,000. (zippia.com)
- If your lumber isn't as dry as you would like when you purchase it (over 22% in Glen Huey's opinion…probably over 10-15% in my opinion), then it's a good idea to let it acclimate to your workshop for a couple of weeks. (woodandshop.com)
- Most woodworkers agree that lumber moisture needs to be under 10% for building furniture. (woodandshop.com)
External Links
How To
How do you accurately measure wood?
Wood measurement can be done using several methods. We use a digital scale (a tool for measuring distances), a laser-level (used to level your work surface), as well as a bubble level (used in order to level your work surface).
A digital caliper has two jaws that open and close. The one jaw holds the object to be measured, while the other measures distance between them. Digital calipers are great for measuring small distances, such as thicknesses of wood.
Laser levels are equipped with an infrared light beam, which projects a line across a floor. The laser emits an infrared light beam that projects a line across the floor. The line can be viewed down to determine if the surface has an even surface. For large surfaces, laser levels are the best way to check their accuracy.
Bubble levels look similar to a compass. The device's center bubble is visible. As long as the bubble is centered, the device will tell you whether the surface is level or not. For checking the accuracy of small areas, bubble levels are useful.