
This article will show you how to carve spoons. You will also learn some of the techniques required to carve spoons. You can also use a leather scraper to make a roll with your knife. This doubles as a roll. This article contains tips and tricks that will make your spoons look beautiful.
Wooden spoon carving
Maple is a good wood choice for beginning spoon carvers. This soft wood has a beautiful grain and is easy to access. It's also very soft, compared to basswood, and gives off a sweet scent to the air. Silver maple is a good choice for your first carving project. Or, you could use any other hardwood such as walnut, cherry or hickory. Once you've decided on the design, trace it using a pencil and cut it out with a spoon carving knife.
First, pick a suitable wood for your spoon. If you select a hardwood such as maple, a scrap of wood should be approximately four inches long. This will help prevent wood from drying out. A good piece is one that has few chips. It will look just like a finished spoon. Online templates can be used to aid in your carving. If you don't have a scrap piece of wood handy, you can cut one yourself.
Tools
A few tools are needed to start spoon carving. The axe is an important tool because it will shape the spoon. A good axe to start with is the Gransfors Bruks Wildlife Hatchet. It's lightweight, has a suited edge geometry, and is exemplary quality. If you feel adventurous, you can also use a bandsaw. A spoon gauge helps you to measure the depth of the carving before you move on.

Sketching out the spoon's shape will be your first step. A simpler shape is easier to carve. Therefore, a straight handle can help you achieve the desired shape. To cut the desired shape, you can use a template. You will need a crook or gouge to hollow out your spoon's bowl. To accomplish this, start at the southern end of your bowl and move towards the North.
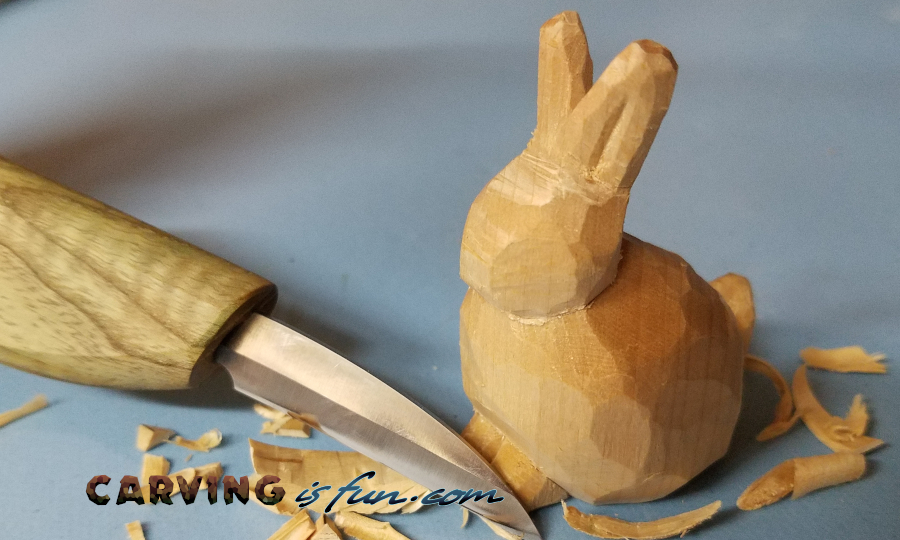
Techniques
To start carving, beginners can use maple. Maple is an easy to source soft hardwood that lends a sweet scent to the air. Maple is also much more easy to carve that basswood or other softwoods. Once you learn how to carve maple, you'll be carving beautiful spoons in no time. Once you have the basics down, you can move on with more difficult woods like oak and maple.
The gouge is used to first roughen the bowl. You can smoothen the convex side by using the gouge. Then, round out the head by removing material along the edges. A rounded sweep gouge can be used to carve the spoon's face if you are new to spoon carving. This will help you avoid chipping or cracking the wood.
Woods to use
For beginners, you can choose pine or basswood as the wood to carve a wooden spoon. Save money by purchasing the spoon with the remaining chunk. While these woods can be used to make carving spoons, they are also suitable for use in other applications such as oak, cocobolo and aspen. These woods' pores are large enough that oil can be absorbed by them. Because they are hard to carve, beginners should steer clear of oak, aspen and cocobolo.
Butternut and Basswood are the best woods to carve spoons from. They are both sturdy and soft and are perfect for holding details. You can also ask tree trimmers for wood if you live near a forest. Sometimes power companies will cut limbs from trees and put them through chippers for disposal, but some of these woods are perfect for making spoons. Whatever wood type, choose straight-grained pieces of wood.
Steps to carve the spoon
The first step in carving a spoon is to prepare the wood. The rough edges of the wooden spoon can be removed using a carving knife, chisel and/or rasp. To break the wood, you can use a mallet if you don’t have one of those tools. To make it easier to hold the spoon while carving, leave a bit of extra wood at one end. You can also use the saw to make angles cut according the shape of your bowl.
Next is shaping the bowl with a chisel. Starting at the end of the bowl, work your way up to the tail. Once you're satisfied with the shape and handle of the bowl, you can use the carving knife to fine tune it. Use your thumb to leverage and not cut too deeply. After shaping the handle, you can round out the spoon's appearance by rounding it.
FAQ
Is it difficult to start my woodworking business?
It is difficult to start your own woodworking company. You will need to adhere to many legal requirements. You don't have to go through all that hassle of setting it up. Many people choose to join existing businesses. You will only have to pay membership fees, taxes, and other charges.
How do I identify the type of wood that I am dealing with?
When purchasing wood, always check the label. It should have information about the wood species as well its moisture content and whether any preservatives were used.
Is it possible to learn woodworking by yourself?
It is best to do it yourself. Woodworking takes practice, skill, patience and experience. It takes time to master any craft.
You can learn the most effective way to master a skill is by actually doing it. Start small and then build upon what you've learned.
What kind of tools do carpenters use?
A hammer is the most commonly used tool by carpenters. A hammer helps to carpenter pound nails into the wood. It also helps them hold pieces together while they are working on a project. Other tools include clamps, pliers, screwdrivers, measuring tape, pencils, saws, drills, and wrenches.
What wooden items do you sell well?
These wooden products are the most popular. They were made from sustainably harvested wood.
Maple, cherry, mahogany walnut, teak, mahogany and maple are the most common woods for furniture.
These woods are very strong, but they also have beautiful grain patterns and colors. They are also very durable if properly maintained.
To prevent moisture damage, wood furniture should always first be painted. All surfaces should be painted, including doors, drawers, and handles.
Paint that is water-resistant will ensure furniture lasts for a long time.
You should use a high-quality oil-based primer followed by two coats of top coat. It is possible to apply multiple coats depending on how heavy the wear.
You should avoid using aerosol paints or spray cans. These products contain solvents which evaporate quickly and leave behind harmful fumes.
What is the difference between a hobbyist woodworker and a professional woodworker.
Hobbyists enjoy creating things out of wood. Professionals tend to focus on the quality. Hobbyists often take pride in the creations they make and often share them to family and friends. Professionals will spend hours looking at designs before they start to build a project. They'll pay great attention to details, from choosing the most suitable materials to finishing the work perfectly.
Where can you buy your woodworking materials?
There are many places that you can find all the information you need. You could also visit hardware stores in your area or shop online at Amazon.com.
You can also search flea and garage sales for furniture and other materials that can be reused.
Statistics
- The best-paid 10 percent make $76,000, while the lowest-paid 10 percent make $34,000. (zippia.com)
- Woodworkers on the lower end of that spectrum, the bottom 10% to be exact, make roughly $24,000 a year, while the top 10% makes $108,000. (zippia.com)
- The U.S. Bureau of Labor Statistics (BLS) estimates that the number of jobs for woodworkers will decline by 4% between 2019 and 2029. (indeed.com)
- If your lumber isn't as dry as you would like when you purchase it (over 22% in Glen Huey's opinion…probably over 10-15% in my opinion), then it's a good idea to let it acclimate to your workshop for a couple of weeks. (woodandshop.com)
External Links
How To
How to make wooden joints
This tutorial will help you join two pieces of wooden together. We will use the pocket hole joint, which is drilling holes in the wood to join them. This method is great if your wood's straight and smooth. Dowel joinery might be a better option if your wood is not straight or flat. Here are the steps
-
Drill Pocket Hole Joints. First, measure the area where you wish to place the pocket joint. Then drill 3/4 inch deep holes into the ends of each piece of wood using a jig saw or handheld drilling machine.
-
Sand Smooth. You can sand the edges of the wood to ensure that it doesn't split.
-
Glue together. Apply glue to both sides of the wood. Let it sit for about 5 minutes before clamping the pieces together.
-
Secure the pieces together. After the glue has dried properly, clamp the pieces together to make sure they are flush.
-
Trim Joinery. After the glue dries completely, trim off any excess wood around the joint.
Be sure to leave enough space between each piece so that they can be turned inside-out.